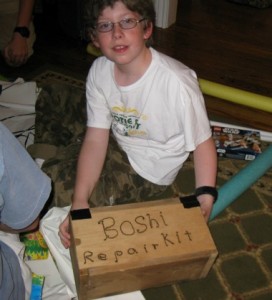
I am delighted to have Eric Weber as my first guest writer for First Heralds. As I promised in my “Cherished Friendships” post last week, today he’s sharing with us how he burned the letters in Aidan’s gift box.
I watched Eric testing a project using this technique and it was fascinating — and it really works! It requires minimal materials and with a little supervision even younger children could try it.
How to Do Easy Wood-Burning Without a
Wood-Burning Kit
by Eric Weber
A few weeks ago, I decided to make a Boshi Repair Kit for my friend, Aidan Cameron-Smith, including a pipe-cutting tool, lots of duct tape, PVC pipe and pool noodles, but I also wanted to include something with the gift that I had made myself.
I decided to use a technique I had accidentally found many months before when I was researching another project. I found out that if you have any chunk of wood, even a large piece of bark or something, you can use a magnifying glass to burn fairly good-looking lines into it, even letters if you want, which is what I did. I used this technique to label the Boshi Repair Kit box that I gave Aidan for his birthday.

I am going to tell you step-by-step instructions for burning your own letters or designs into wood, using this technique.
Step 1: Mark Twice, Burn Once

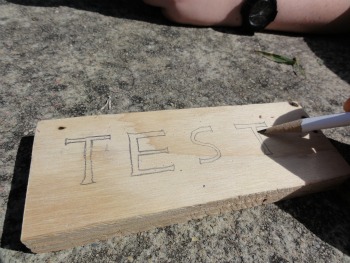
I have found that it is always helpful to sketch your design out before trying to burn it, as otherwise your letters tend to get smaller as you go along. This also allows you to produce a more intricate font than you would have otherwise. Be sure to mark the lines wider than you want so that you can erase them more easily afterwards.
Also, I have found that it is almost always easier to mark the letters in uppercase, but it isn’t any harder to do lowercase once you are actually burning it. Below, you can see this process, where I wrote TEST on a piece of wood:
Step 2: BURN!
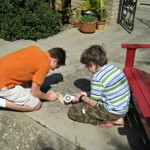
Well, not really. First, you have to choose a magnifying glass. Naturally, the larger the lens, the more light concentrated, the faster the burn. Also, the higher quality lens you have, the tighter the focus point will be, and therefore the easier to make smaller lines. As for a minimum, I used a plastic lens from Legoland that was less than two inches in diameter and was very badly scratched, which worked just fine.
Then, you must find some wood to burn. Any untreated wood would work just fine; treated wood could cause problems. If you were, for instance, trying to burn a table treated to be heat-resistant, it would take a very long time. Any wood treated with even non-heat-resistant varnish, though, could still cause problems by releasing toxic fumes when burnt.
Now you can prepare to begin burning. First, find a relatively fire-proof area. Concrete is an excellent choice. Most times, it is impossible to ignite a blade of grass, but you can never be too careful. Get a pair of darkish sunglasses, as this makes it actually possible to see what you
are doing.
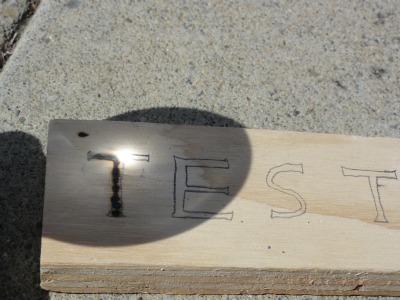
Next, spend a minute or two finding the optimal angle for the lens. You should aim to get a dot about a millimeter around, depending on the quality of the lens. If you get a strange, slightly triangular shape, then your lens is not lined up with the sun properly. If you are serious about it, find a way to mount the lens in position so that you move the board instead of the lens.
Once your lens is ready, put the block of wood underneath and focus it again to get the best results. Be sure to leave enough space between the burn and the marks so that you can erase the marks without picking up too much of the burned wood. That’s pretty much it for burning it; just move the lens to burn the lines. As you can see below, if you are not patient enough, the lines will be bumpy.
However, if you take your time, they can look very good.
Step 3: Erase the markings
Erase the markings you made around the letters. Be sure to use a good, rubbery eraser, because if you use a cheap, dry one found at the end of most pencils, it will be gone before you finish cleaning up the edges of three letters. You’re done!
*Eric Weber is 14 years old and has always been homeschooled. He enjoys making electronics, music, and track. He likes being homeschooled because it allows him to pursue his many hobbies and he likes the flexibility homeschooling allows in his schedule.


Love this idea! I’m pinning it (via Pinterest.com) for use in the future 🙂
I want to do it too!!!